

Manage mass actions
Learn how to manage mass actions in Zuora Revenue by applying common operations to multiple lines in a batch.
In Zuora Revenue, use the mass action to apply a common operation to multiple lines in one batch. To accomplish this, you create a batch, choose one action from the supported ones, and specify a filter to pick up the target lines to which the action should be applied.
Supported Mass Actions
The following mass actions are supported in Zuora Revenue for Zuora Revenue users and Order to Revenue Tenants.
Procedure
-
Navigate to Workbench > Manage Mass Actions. The Batches page lists all the previous batches.
-
To create a mass action, click the New Batch icon (+) . The New Batch window gets displayed.
-
On the Batch Details tab, complete the following steps. For the Action On and Action Type fields, refer to the table in the section.
- Enter a unique name for the mass action in the Name field.
- Select the target object from the Action On drop-down list.
- Choose the appropriate action from the Action Type list depending on the selected object.
- If there is more than one revenue book configured in the system, use the Book list to specify where to look up the target object lines.
-
Depending on the selected action type, provide other information in appropriate fields that are displayed in the UI.
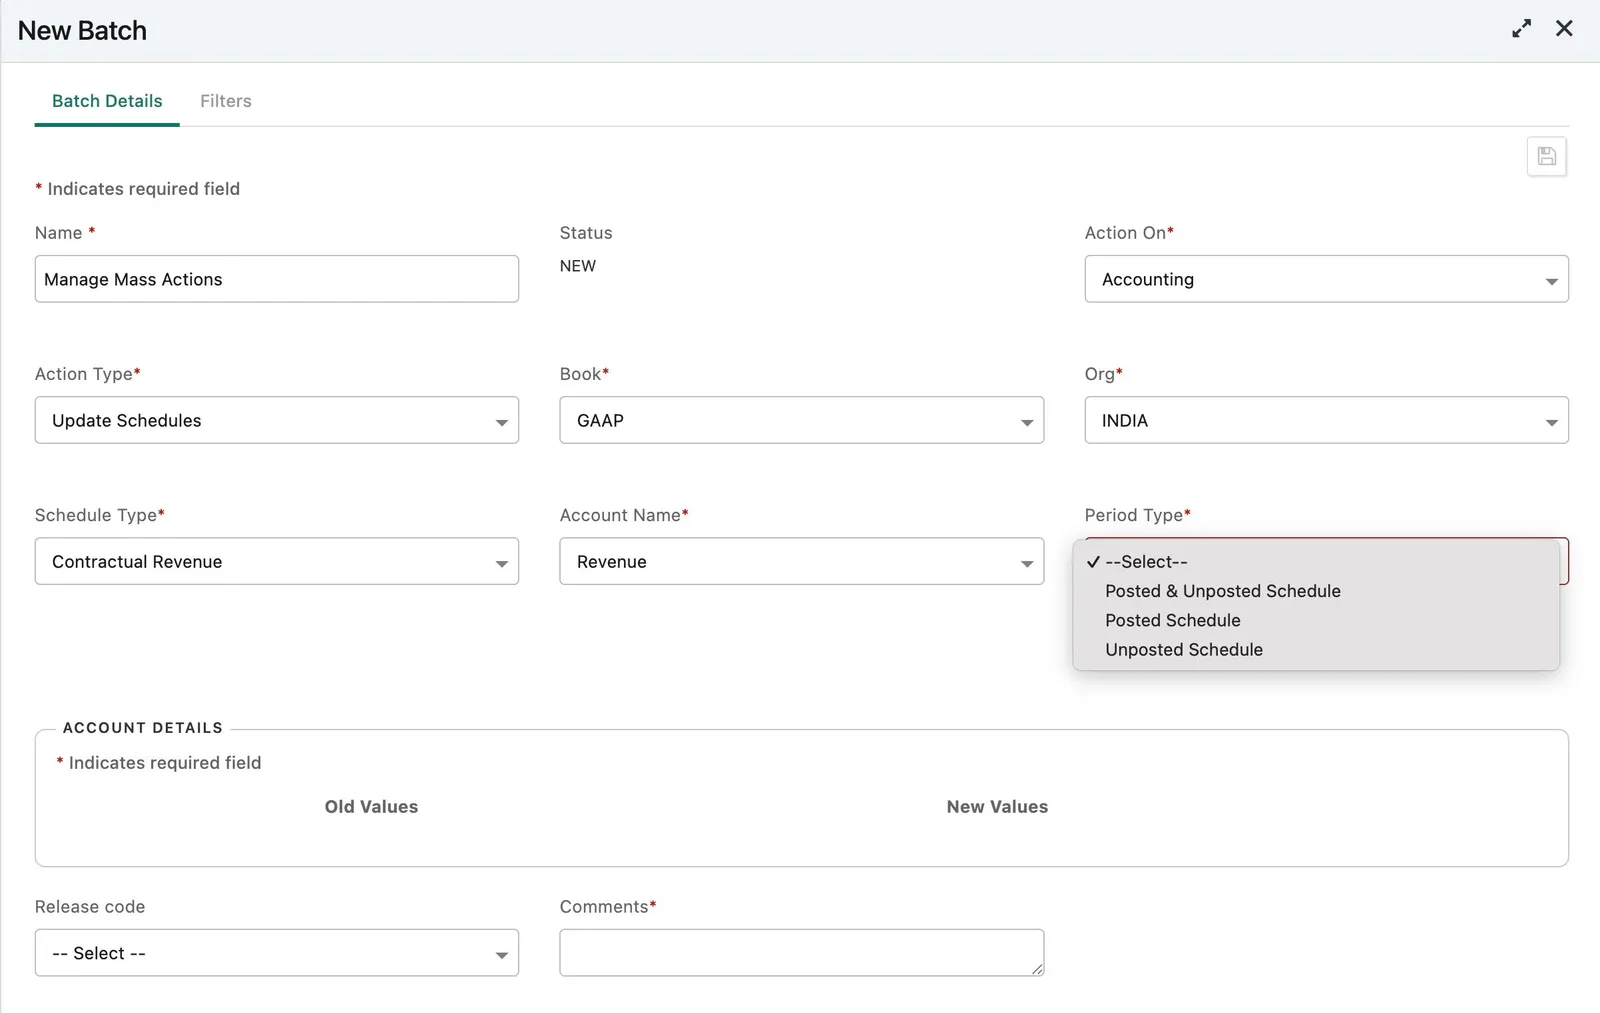
For example, if you update the business unit code under account details for a contractual revenue, specify the Old and New Values in the Account Details field. The following screenshot shows updating accounting segments of unposted schedules for the POB line based on the schedule type. If you have chosen the option, ‘Update Schedules’ in the ‘Action type’ field, you can choose one among the following options:
- Posted Schedule: Updates only posted schedules that were posted schedules that were update earlier.
- Unposted Schedules: Updates only the unposted schedules that were updated earlier.
- Posted and Unposted Schedules: Updates both posted and unposted schedules that were update earlier.
Tip:
Updating empty or null segment positions
To populate segment positions that are empty or null, enter
NULL(typed literally, not left blank) as the Old Value for each empty segment position, and enter the desired value as the New Value.This allows you to:
- Build a complete accounting segment string from an entirely null segment column
- Fill specific empty positions within a partially populated segment string (for example, when leading positions are empty)
Note: The Old Value
NULLmatches only empty or null positions. It will not overwrite segment positions that already contain a value. This applies to Revenue and Liability account segments across all schedule types. For Cost schedule type, empty-segment updates apply to standard cost only.
-
- Leave your comments in the Comments field for this mass action.
-
Click the save icon. The batch gets created.
-
Click the Filters tab in the same window to set the criteria for the system to identify the target object lines.
-
Click the ’+’ icon to add a line.
-
Use the Seq column to specify the sequence in which the filter should be applied. The following screenshot shows a filter that identifies three revenue contracts based on their IDs and a particular PO. For information on the usage of IN operator in filters, see the community post titled “How does the operator IN in a batch filter work”.
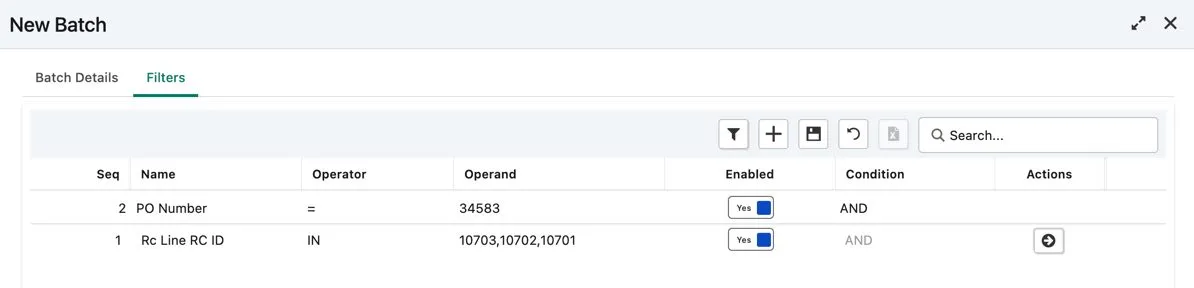
Note: Use the AND, OR condition if you want to combine multiple conditions within the same query.
-
-
Click the save icon and close the window. On the Batches page, the batch status is NEW.
-
On the Batches page, hover the mouse over the batch line that you created and click the Query Data icon. The system will apply the filter to identify the target lines. After data is identified, the batch status is changed to Data Identified.
-
Click the Review Data icon to review the identified lines in the Review Data window.
-
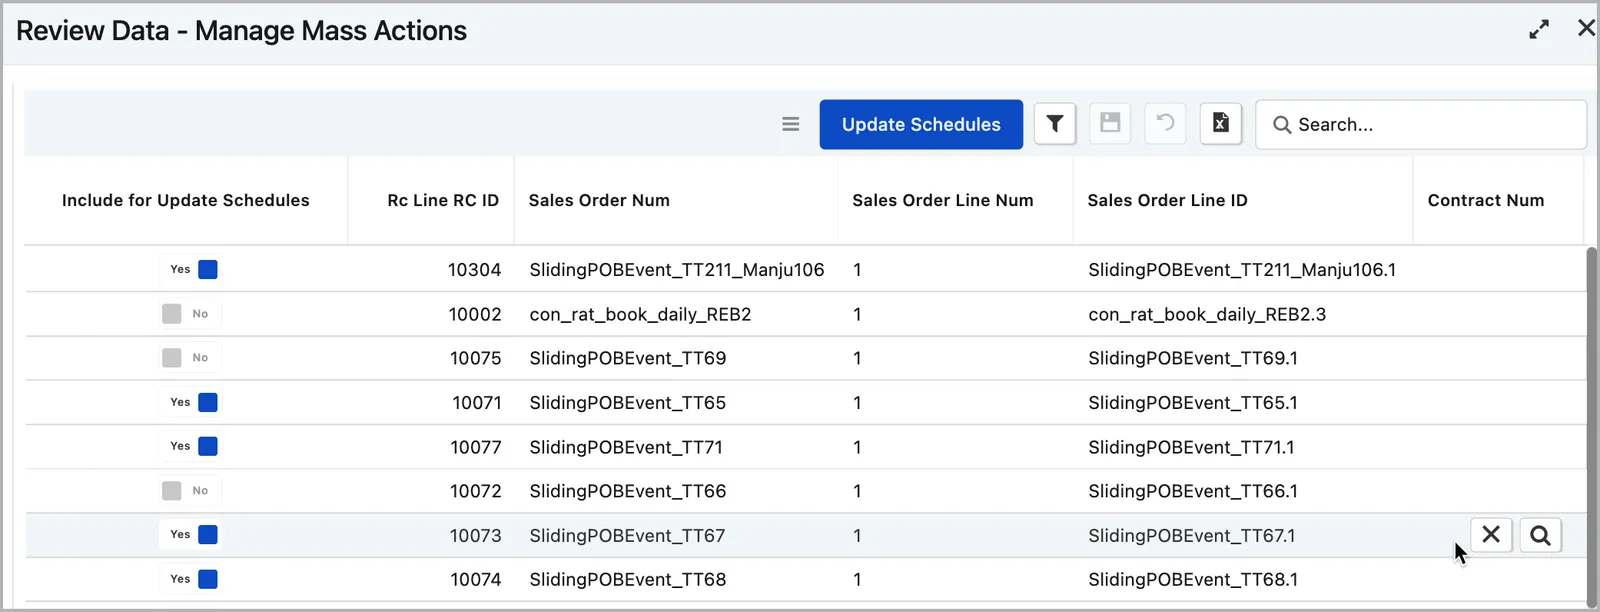
To exclude any particular line from the mass action, hover over the line and then click the ‘X’ icon. The following screenshot applies to the update schedule action.
-
To trigger the mass action for the identified lines, click the action button in the Review Data window. The actual button name might vary depending on the action. It is the same as the Action Type name that you selected in Step 3.
After the mass action is completed, the batch status changes to Action Completed.