

Deploy configurations to the target tenant with GitHub actions
Learn how to deploy configurations to a target Zuora tenant using GitHub Actions for seamless and automated deployment processes.
You can programmatically deploy the latest version of configurations from a source code repository to a target Zuora tenant using GitHub Actions. This approach enables seamless deployment once configurations are tested and verified.
- GitHub Actions workflow is available and customisable at the user level and not at the organization level.
- Integrate automated testing to validate changes before they are merged. This helps catch issues early and ensures stability. Configuring a workflow in GitHub Actions may also achieve this framework.
- Product Catalog Deployments are currently not available with GitHub Actions.
When a file is stored in the GitHub repository, the Deployment Manager creates a .github/workflows folder. This folder contains a .yml file designed for triggering deployments to target tenants using GitHub Actions.
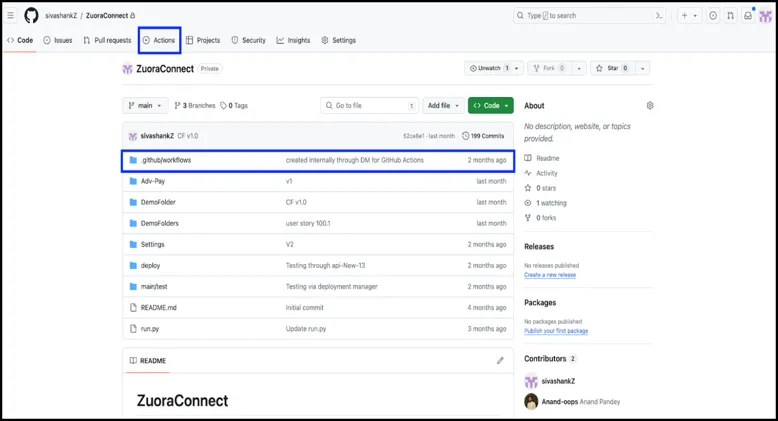
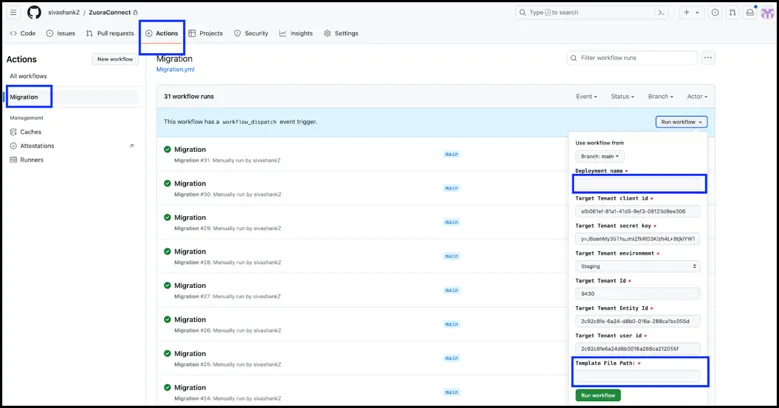
Provide the Deployment Name and Template File Path for each deployment. Other parameters (e.g., Tenant ID, Environment, etc.) are auto-populated based on the migrate.yml file configuration.
Customize the Migrate.yml File for Zuora Landscape.
The migrate.yml file is editable, allowing users to tailor it for specific Zuora tenants. Key customizable fields include:
- Client ID and Secret Key : Credentials for authentication.
- Environment : Specifies the target environment (e.g., production or sandbox).
- Tenant ID and Entity ID : Identifiers for the deployment target.
- Template File Path: Path to the configuration file in the repository.
You can duplicate and modify this file for workflows targeting multiple tenants. When duplicating, ensure the file name is updated for clarity and distinction.
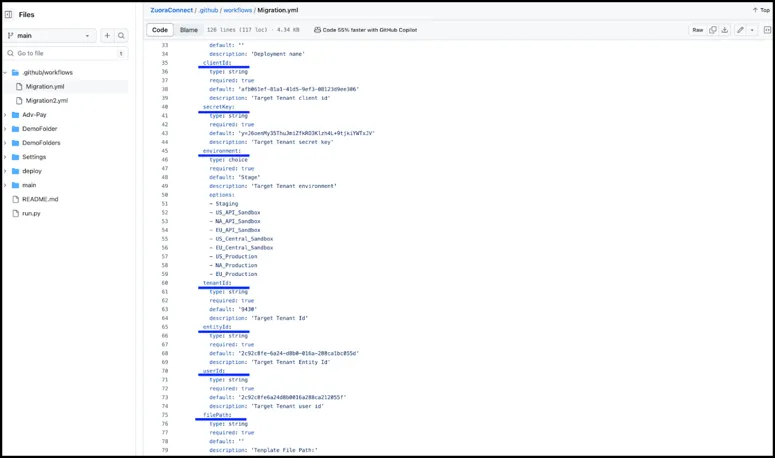
When modifying the Migrate.yml file, it is essential to implement syntax validation to check for errors before applying changes. Ensure that all necessary fields are populated and correctly formatted.
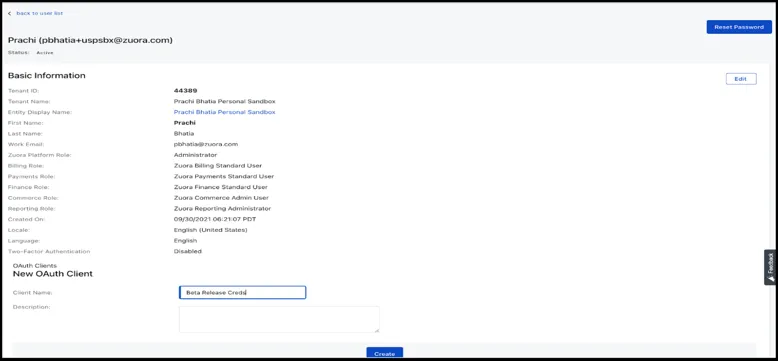
To generate a Client ID and Secret Key, navigate to Administration > Manage User in Zuora. Click on your username, provide a name for the
Client Name field, and then click Create. This will generate the required credentials for authentication.